Tuesday, September 30, 2008

Ski Bunny Hanna Sneak Peek


Look at this sweet Snow Bunny Hanna! Oh my gosh, I love her! Every image in the set is TOO CUTE!! The Hanna releases just get better and better...... and wait till you see the new Riley/Sophie stamps! I'm drawing a winner tonight by the way, so don't forget to enter for a chance to win the Hanna blog candy! (see previous post).

I paper pieced Miss Snow Bunny and added Fun Flock to her gloves, socks, and hood. Her skiis are covered with Angel Wings Shimmerz and her snow goggles with Glossy Accents. Are they
called snow goggles? What are they called? I have no idea, because we don't get snow on the OR coast. I remember one year we went to Crater Lake and my friend Lana thought it was hilarious when I calling those things snow bibs. I am snow attire illiterate. All I know is that she looks hot. :)


Supplies:

Stamps: Snow Bunny Hanna
Paper: Neenah White, Chocolate Chip, Pink Passion, Georgia Peach Designer Paper (SU!).
Ink: Ranger Distress Soot Black, Copic Markers.
Other: Pixie Pink Fun Flock, Pastel Raspberry Liquid Pearls, Glossy Accents, Quickie Glue Pen, Scallop Edge Punch, Scallop Square Punch, Nesties, Cuttlebug, Dimensionals, Chocolate Chip Poly-Twill Ribbon, Janome Sew Mini, Angel Wings Shimmerz, Paint Brush, Holiday Snow Dots Embossing Folder, Scor-Pal.

Don't forget to add your name to the blog candy post... it's the last day!! And, thanks for all the sweet comments.... you make my days! Have a great day.... thanks for stopping by!

Sunday, September 28, 2008

Blog Candy!!!


What's better than chocolate mousse? New Riley stamps of course!!!!

In celebration of Hanna Stamps first year in business, Kristi has lots of giveaways for you!!!!!

Visit our Design Team Blogs between now and Wednesday, October 1st to see exciting sneak peeks and for the chance to win a never seen before Riley/Sophie Moose Image.

Leaving a comment on each blog, will increase your chances of winning. One new stamp per Design Team member blog will be given out. Winners will be announced at the Hanna Stamps Release Party on Thursday October 2nd at 9:00 p.m. So pop into the party for challenges, prizes, chatter, more prizes and to see what the Design Team has in store for you.


Check out the other design team members!!!

Hanna Stamps Team

Adela - Creations by AR

Amanda - Inkspirations

Beth - Freckled and Fun

Bev - Savor the Journey

Candice - Rubber Soul

Cindy - Cindy Haffners’s Corner

Frances - Stamp Owl’s Studio

Janette - Stampin with Style

Jeanne Streiff - Inky Paws

Judy - Rock is Dead

Kittie - Kittie Kraft

Niki - My Paper Creations

Pam - Iris Garden

Patti - Design {U}

Shannon - Live, Love, Laugh & Stamp

Vicki - DT Coordinator Queen - Summerthyme Studio

Kristi - Owner - Kreations By Krissy


Friday, September 26, 2008

Beate's Weekend Sketch Challenge #59


Hello Friday!! Wow, it's been a crazy busy week. I'm looking forward to tomorrow because it's stampin' day with my girls! Today is Beate's Weekend Sketch.... hope you can play along with us .
Did this week go by super fast for you too? Wow, where did September go?

As always, Beate has a great sketch for us. I used the Sweet Always Designer Paper for the three panels. The scallop is made with the Pennant Bigz Die from Stampin'Up! The birds are colored with watercolor pencils and then blended with a blender pen.

Here is the sketch:
Don't forget to check out the other girls on Beate's Sketch Team:

Charmaine Ikach
Jenn Balcer
Laurie Schmidlin

Lori Craig

MaryJo Albright

Sharon Harnist


I liked this sketch so much, I decided to try in on the side too.

Supplies:

Stamps: Love Owl-ways (Stampin'Up! Holiday Mini)
Paper: Chocolate Chip, Pink Pirouette, Only Orange, Sweet Always Designer Paper.
Ink: Timber Brown Stazon, Watercolor Pencils.
Other: Pink Taffeta Ribbon, 1 3/4 inch Circle Punch, Pennant Die, Big Shot, Crafter's Tool Kit, Scallop Edge Punch, Dimensionals, Watercolor Pencils, Blender Pen, Scor-pal.

Hope you all have a wonderful weekend! As always, thanks so much for stopping by!

Thursday, September 25, 2008

Mr. & Mrs. Frankie Treat Boxes


Sorry I haven't posted much this week, but it's been SO busy in the Turnbow house.

I have a class on Saturday with my girls, and this is one of the projects we'll be making. You'll have to tune in next week or over the weekend to see the rest. :)

The Frankie face was inspired by many that I've seen. If it was your original idea, send me a quick note and I'll be happy to give you credit. I didn't CASE anyone specifically. The Frankette idea hit me when I saw the pink cardstock out on my desk. LOL.. there is always pink cardstock on my desk! The little bow stamped in her hair is from the Just Jawing stamp set with a Round Rhinestone brad in the center. Frankie's eyelids are raised up with dimensionals.

OMGosh.. these were SO easy to make if you have the Big Shot! I'm totally whipping these out for my daughter's classroom this year. Okay... so my heart needs some work, but I did it on a whim. Here is what the back of the treat boxes look like.


And from the side:


I used the box in my previous post that was designed by Jody Morrow. See previous post for a link to her tutorial. I modified it slightly by doing the following:

I cut my card stock 6x 11 and scored the 11 inch side at 4.5 and 6.5 with the Scor-Pal. Then I flipped the cardstock so that the six inch side is at the top of my Scor-pal and scored at 1.5 and 4.5. I then slid it into my Fiskers cutter and cut on the score line from the top of the 6 inch side down to the center score line. I did that on each score line for a total of four times. Then, I slid the 11 inch end into my fiskers again and cut off two inches of the flaps we just made. I then used my Scallop Edge punch and centered it along the ends to make the ends pretty.Fold and glue.

Instead of glueing the sides like I did with the Baby one, I left these unglued to make it easier to get into the box. I also closed them differently by using the Slot Punch and ribbon. If you don't like the ribbon showing, you can tuck the bow down inside.

*Make sure when you are adhering your faces on, that you do not add any adhesive around the slot punch so that you can slide the ribbon through.

Supplies:

Stamps: Just Jawing (for Frankette)
Paper: Green Galore, Pink Passion, Elegant Eggplant, Basic Black, Whisper White.
Ink: Green Galore, Black Stampin Write Marker.
Other: Sponge, Rhinestone Brad, Grograin Black and Gingham Ribbon, Slot Punch, 1 Inch Circle, 1/2 inch circle Punches, Round Tab Punch, Scallop Edge Punch, This Way Punch, White Uniball Gel Pen, Dimensionals, Scor-pal, Big Shot, Top Note Die, Small Cello Bags, Candy.

I may have time to write up a tutorial for my customers, if I do , I will share, but I think the directions above and Jody's tutorial, you won't have any problems. These are EASY PEASY! :)

Thanks for stopping by... see ya tomorrow for Beate's Weekend Sketch Challenge!

Sunday, September 21, 2008

Heart to Heart Blog Candy


Wowza! Would you like to win a chance at winning over $1,000.00 in prizes, donated by all THE best stamping/crafting companies?

You DO NOT want to miss my friend Carolyn's blog candy!! And, better yet, it's for a GREAT cause! Please go over and check it out... what an amazing, generous bunch of woman. You are DA BOMB miss Cammie!!

Saturday, September 20, 2008

Baby Gift Box


I saw this cute little box on SUDSOL, shared by Paula Geoff. It is one of Jody Morrow's creations. Jody,( some of you know her as TexasJodyLynn), is my stampin IDOL. Love her, love all she does. If you haven't been to visit her blog, you are missing out! Visit her over at Confessions of a Ribbon Addict. Be prepared to have your socks knocked off ... you've been warned. :)

I changed it a bit. You can see a tutorial written by Jody Morrow here. (Thanks Jody!) I cut my card stock 6x 11 and scored the 11 inch side at 4.5 and 6.5 with the Scor-Pal. Then I flipped the cardstock so that the six inch side is at the top of my Scor-pal and scored at 1.5 and 4.5. I then slid it into my Friskers cutter and cut on the score line from the top of the 6 inch side down to the center score line. I did that on each score line for a total of four times. Then, I slid the 11 inch end into my friskers again and cut off two inches of the flaps we just made. I then used my Scallop Edge punch and centered it along the ends to make the ends pretty.Fold and glue. I made the slots at the top of the box with my Word Window punch and then added a Kaiser Rhinestone to one of the clippies in the Stampin'Up! Clip assortment pack and clipped it closed.

I used the Flower Power and Baby Carriage stamp singles from Lizzie Anne Designs. This came together super easy and fast. I added some shazam to the carriage with Bubble Gum and Magenta Shimmerz Paint.

Supplies:

Stamps: Flower Power and Baby Carriage (Lizzie Anne Designs.
Paper: Kraft, Pink Pirouette.
Ink: Whisper White Craft, Ranger Distress Soot Black.
Other: Dimensionals, Tag Punch, Word Window Punch, Scallop Edge Punch, Clip Assortment, Heidi Grace Pink and Brown Brads, Kaiser Rhinestones, Scor-pal, Crafter's Tool Kit.

Hope you all have a great weekend. I had three out of four kids home yesterday feeling really bad. Today is a better..... I just hope I can skip this bug!!! Thanks for stopping by!

Friday, September 19, 2008

Beate's Weekend Sketch Challenge #58


Happy Friday everyone! Wow, this week went by FAST. Way too fast and my weekend doesn't look like it will be any less busy. To top it off, I've got two very sick kids. Sheldon came home early yesterday from school and Jayce was up throughout the night just miserable. Looks like I'll be making a trip to the Dr.'s office this afternoon.

So, yah, I'm up late being a last minute weekend sketch slacker. I grabbed some scrap designer paper and the new set I just got from the upcoming Holiday Mini from Stampin'Up! and this is what I ended up with. Can you see the hearts? I love hearts. These are tiny and oh so sweet. I added a bit of glitter with my black atyou Spica pen, which of course is hard to see, but totally gives the card that shazam. :)


Supplies:

Stamps: A Happy Heart
Paper: Sweet Always Designer Paper, Regal Rose, Basic Black, Textured Pink Pirouette.
Ink: Basic Black Craft, Basic Black.
Other: Curly Label Punch, Photo Corner Punch, Crafter's Tool Kit, Jersey Shore Ribbon Originals, Soft Subtle Brads, Janome Sew Mini, Scor-pal, atyou Spica Black Glitter pen.

Here is the sketch... hope you can play along with us this weekend:

Check out the rest of Beate's Sketch Team by clicking on their names:

Charmaine Ikach
Jenn Balcer
Laurie Schmidlin

Lori Craig

MaryJo Albright

Sharon Harnist

Hope you have a wonderful weekend... thanks for stopping by!

Thursday, September 18, 2008

Love Owl-ways


The Holiday Mini Catalog will be available October 1st! It's only a few weeks away! Dang... where did September go? Here's a sneak peek of one of my favorite sets from the mini. It's called Love Owl-ways. Look at that sweet little birdie!!
I told you that I was a sucker for all things hearts.


The little mailbox flag is cut out and raised up with a dimensional. I stamped another mailbox, colored the flag, cut it out, then stuck it over the one on the image.


Supplies:

Stamps: Love Owl-ways
Paper: Ballet Blue, Whisper White, Georgia Peach Designer Paper, Barely Banana.
Ink: Distress Soot Black, Copics, Basic Brown.
Other: Nesties, Cuttlebug, Dimensionals, Bubble Gum Shimmerz, Fairy Tale Ribbon Originals, Filigree Brads, Crafter's Tool Kit, Barely Banana Brad, Stamp-a-ma-jig, Scor-tape.

Wow, it's been a busy week! My 15 year old got his driver's permit AND opened his own checking account. Talk about making me feel old. He was SO happy he got it on his first try. He read the manual as soon as school was out, then realized this summer that he had to have a student enrollment form filled out by the school to show the DMV before he could test. He's a little nervous about learning to drive, but I know he'll do wonderful... he's a great kid. :)

Hope you all had a great week so far... I'll see you tomorrow for Beate's Weekend Sketch.

Monday, September 15, 2008

Birds of a Feather


One more card made with the set L'Amour. Don't you just love the sweet face on this bird? I love the heart swirly background and the hearts on her tail too. The heart tucked under her wing and the one on the ground are actually the wings from the butterfly in the set stamped onto the Chatterbox designer paper, then cut out. I took a craft knife and made a little slit above her wing to tuck one in. The bird is colored with Copic Marker Y21. I added the light spots with the Copic Blending Pen. The sentiment is raised up on Dimensionals. I also added Beeswax Shimmerz Paint to the hearts on her tail and the flowers on the hearts.

Supplies:

Stamps: L'Amour (Lizzie Anne Designs)
Paper: Prism, Neenah White, Chatterbox Designer Paper (Tangerine Beach Blossoms).
Ink: Ranger Distress Soot Black, Copic Markers, Versamark.
Other: Shimmerz Beeswax, Nesties, Cuttlebug, Taffeta Ribbon, Word Window Punch, Dimensionals, Scor-pal.

Today was the first day with the new bus schedule. The kids had to be ready to catch the bus at 7:17. We live less than five minutes from the school..... it's CRAZY. I could see them being on the bus that long if we lived out of town. I predict, there will be a lot of "missed the bus" days.

Have a great Monday everyone! Thanks for stopping by!

Sunday, September 14, 2008

L'Amour


Okay, so my friend Pine has me on a Kraft cardstock kick. I got it out because I ordered her new stamp set and HAD to use Kraft with it, now I can't put it away.

This stamp set is from Lizzie Anne Designs... one of my very favorite stamp companies. :) It's called L'Amour. Those girls are SO awesome at putting together great sets. They always have a nice variety of stamps and sentiments so that your creativity has no limits. I think besides floral sets, my next weakness is sets with hearts. LOVE that butterfly with the heart wings.

September is a really difficult month for me and my family. So, even though I look forward to fall and the kids going to school and the crisp fresh air, there is also a sickness in the pit of my stomach that brings back really difficult memories. I lost my sister in a car accident... she was killed on the 7th and her birthday was the 10th. It's been 18 years now, and although the pain isn't an every day feeling anymore, it always seems to come back with a vengeance in September when I can really feel the hole in my heart and the big void space that she left in my life. I have very dear friend, who also suffered a huge loss this week last year. Her pain is still very fresh. My heart breaks for her. I know what a struggle it is to seem normal to others when you feel like you are broken to pieces inside. I'm sending her this card with a hug just to let her know that I am thinking of her and I love her and I wish I could take away some of her pain.

Here is the recipe:

Stamps: L'Amour
Paper: Kraft, Barely Banana, Whisper White, It's a Party (Heidi Grace).
Ink: Memento Tuxedo Black, Craft Whisper White.
Other: Nesties, Cuttlebug, Dimensionals, Banana Brads, Fairy Tale Ribbon Originals (SU!), Crafter's Tool Kit, Janome Sew Mini, Scor-pal.

Hope you all had a wonderful weekend...boy they go by fast. See you tomorrow.

Saturday, September 13, 2008

Happy Birthday Riley


Happy Saturday! I've got one more Hanna Sketch Challenge today. You can check out my previous post to see the sketch by Shannon. We'd love for you to play along with us!

I colored Riley with Copic markers and decorated the birthday cake with Shimmerz Bubble Gum paint. I then added "frosting" with Pastel Raspberry Liquid Pearls. Love this fun sketch!


The Recipe:


Stamps: Riley Collection (Hanna Stamps) Cute and Curly (SU!).
Paper: Textured Pink Pirouette, Regal Rose, Neenah White, Sweet Always Designer Paper.
Ink: Ranger Distress Soot Black, Copic Markers
Other: Curly Label Punch, Square Nesties, Cuttlebug, Embossing Folders, Dimensionals, Large Oval Punch, Pink Taffeta Ribbon, Crafter's Tool Kit, Brads, Shimmerz Paint, Liquid Pearls, Scor-pal.

Have a great weekend stampers!!! See ya tomorrow.

Friday, September 12, 2008

Riley Moose Hanna Sketch Challenge


The challenge this week in the Hanna forums is sketch challenge! This weeks challenge brought to us by Shannon Tompkins
. Thanks for the fun sketch Shannon!

I chose this cute Riley Moose with the pumpkins and apples for my main image. He's got Fun Flocked antlers and the leaves, pumkins and the apples have just a little bit of shimmer.


This time instead of painting the complete image with Shimmerz Paint, I just added a bit to the pumpkins, leaves and apples. I used the new colors Beeswax, Rustic Red, and a little bit of Pumpkin Shimmerz Paint. I embossed the background designer paper with leaves and the orange cardstock is embossed with pumkins from the new Cuttlebug Folders.


Can you come and play with us? Here's the sketch:

The Recipe:

Stamps: Riley (Hanna Stamps), Best Yet (Stampin'Up!)
Paper: Prism, Neenah White, Bali Breeze Designer Paper (Stampin'Up!).
Ink: Ranger Distress Soot Black, Copic Markers, Basic Brown.
Other: Crafer's Tool Kit, Shimmerz Paint, Fun Flock, Quickie Glue Pen, Antique Brass Hodgepodge Kit, Large Oval Punch, Pumpkin and Leaves Embossing Folder, Cuttlebug, Ticket Corner Punch, Dimensionals, Scor-Pal.

Have a super weekend!! Thanks for stopping by!

Beate's Weekend Sketch Challenge #57


Hey everyone.... TGIF baby! I don't know about you, but it was a hard week! I'm happy to see Friday and I'm looking forward to the weekend.

Friday means it's Beate's Weekend Sketch Challenge! Hope you can play along with us!

This one was easy but fun.... and look Beate... I sponged! You are proud huh? *snort* I sponged, I sponged.....

The Recipe:

Stamps: Live Like You Mean It (Stampin'Up!)
Paper: Sweet Always Designer Paper, Basic Black, Whisper White, Tangerine Tango.
Ink: Tangerine Tango, Whisper White Craft, Basic Black Craft.
Other: Crafter's Tool Kit, Nesties, Cuttlebug, Black Gingham, Large Eyelets, Vintage Brads, Janome Sew Mini, Scor-pal, Dimensionals, sponge.

Please stop by and check out the cool things the rest of Beate's team did this week... you won't be disappointed. :)

Charmaine Ikach

Jenn Balcer
Laurie Schmidlin

Lori Craig

MaryJo Albright

Sharon Harnist


Have a great weekend!! Thanks for visiting!

Wednesday, September 10, 2008

Congratulations Pinie Girl!!!


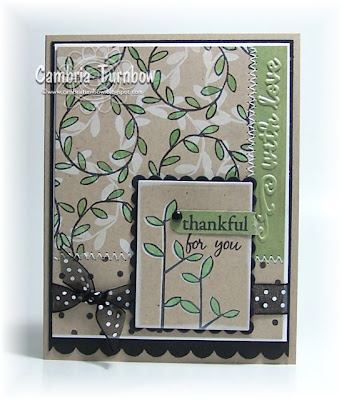
I HAD to have this set from Papertrey designed by my friend Heather! Congratulations my friend.... I'm SO happy and proud of you! RUSTIC BRANCHES ROCKS! Can't wait to see what else Pinefeather Press has in store for us! I wish I could have been at the retreat this year to celebrate in person, but It was nice to be able to tell her congrats over the phone. YOU GO GIRL!! :)

Of course I had to also get out my Kraft cardstock. Pinie is the queen of kraft.... I love all that she touches!


Here is the recipe:

Stamps: Rustic Branches (Pinefeather Press) Available at Papertrey Ink.
Ink: Ranger Distress Soot Black, Craft Whisper White.
Paper: Kraft, Whisper White, Basic Black.
Other: Shimmerz Celery Paint, Small Paint Brush, Polka Dotted Ribbon (starlitstudio), Dimensionals, Cuttlebug Embossing Borders, Nesties, Janome Sew Mini, Scor-pal.

I painted a piece of Kraft cardstock with a wide paint brush using the Celery Shimmerz Paint, let it dry, then ran it through my Cuttlebug with one of the new embossing borders. I also added paint to all the leaves. I love how the Shimmerz brings the Shazam factor to this card. It's just the right touch of shimmer.


Hope you all have a terrific day. I'm off to hunt for a saxophone and a trumpet for the twins. They decided they both want to be in band. Oh, man.... just imagine my house next week while they practice. Always so much fun here at the Turnbow house. :)

Thanks for stopping by!


Tuesday, September 9, 2008

Gift Card Slider Tutorial


Hey stampers! Here is the tutorial I promised for the Slider Gift Card Holder. I had some instructions from SCS by Amy (genescrapper). She wrote her version based on a card from Paper Crafts magazine. This is what I did to make my sliders..... you ready? ** You can click on the photos to see a larger view.

You will need:
Four 2.75 x 4.25 pieces of cardstock
One 5 x 3.5 piece of cardstock
One 5.25 x 2 piece of cardstock
Two 2.5 x 4 pieces of Designer paper
Cardstock to make your center panel (Top Notch Die cut (red) in the photo below)


Word Window Punch

3/4 inch Circle Punch
Round Tab Punch
Dimensionals
Embellishments.

I used:
Top Notch Die, Nesties, The Big Shot (for my front panel) and my Scor-pal and Scor-Mat.

Step one:

Cut your cardstock


Step Two:

Add the designer paper to two of the four 2.75 x 4.25 pieces. Set aside.


Step Three: Take the 5.25 x 2 piece of cardstock and punch out with your word window punch two slots on each side.

Step Four: Punch out four circles with the 3/4 inch circle punch. Add dimensionals to two of them


Step Five: Place the circles with the dimensionals under the slots you made with the word window punch. Peel off the backing, then stick the other circles on top to make a sandwich over each slot.


Step Six:
Add dimensionals to the center and each end.


Step Seven: Peel off the dimensional backs and attach to the center your slider on top of your 5 x 3.5 piece of cardstock.


Step Eight: Center two of the four pieces of cardstock that don't have the designer paper on them on your Scor-mat so that they are straight. This is important to make sure that they are straight and close together.


Step Nine:
Add some Scor-tape on each circle on your slider portion. Peel off the backing and carefully center it onto your pieces in the in the above photo.


You should be able to pull on each end of your blank 2.75 x 4.25 pieces of cardstock and it will look like this.


Step Ten:
Add dimensionals to the top and bottom. The edges of the dimensionals work great, but you could use cut them in half also.


Step Eleven:
Slide out your pieces, peel off the backing on your dimensionals, then carefully center your two pieces with the designer paper over the dimensionals.


Step Twelve:
Add your pull tabs and any other embellishments
.

You'll cut your center piece in half... or at least the main part that will be glued on the front.

The designer paper is glued onto cardstock before I ran it through the Big Shot with the Top Notch Die to give it a little bulk.


Step Thirteen:
Make sure the slider is closed and lined up, then adhere your front piece one half at a time.


Step Fourteen: Embellish the front. Add adhesive only to the top portion when you add it to the front.

* After I opened this one, I decided to add more designer paper on the inside slider part. I just cut a strip and slipped it under. I didn't like the look of the gift card, so I turned it over to the flat side and added cardstock cut in the same shape. When the recipient pulls off the card, they will see the gift card side and the cardstock will just pull off the back. I used repositional adhesive on the gift card and to attach it on the slider portion.


Wow.... this is a long tutorial. I hope it makes sense. I think this would be a fun card for someone who loves cooking or someone who hates it too... you could include a fast food gift card.

Of course I've added my little shazam touches with my Shimmerz Paint, paper piecing, and a little clip ( Clip Assortment from SU!) on the side that frames the lips.

Here is the finished card open:


I added Pull and Here at the top on bottom tabs with my Snap Stamps.


You can see another version here.


If you make a slider... I'd love for you to share the link so I can see! Have a super day, and thanks for stopping by!